Portraits by Aleks
  • Home
  • Bio
  • Commissions
  • My Process
  • Contact
  • Galleries
    • Dog Gallery
    • Cat Gallery
    • Wildlife Gallery
    • Bird Gallery
    • Horse Gallery
    • Other Gallery
  • Client Testimonials
  • Shop

Portraits by Aleks

Colored Pencil Pet and Wildlife Portraits
Picture

My Process...
Step-by-Step process of how I work:

If the drawing is a commissioned piece that I photographed, I first go through all the reference photos that have been taken and choose four or five of them. The client and I sit down together and decide which would be best for the final drawing. We can also do this over email. At times I need to combine a number of photos to achieve the desired result.
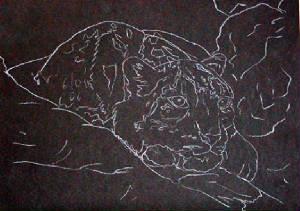
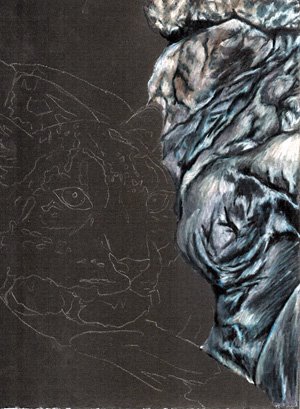
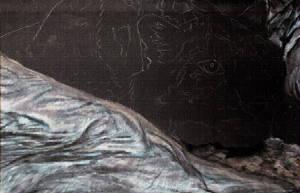
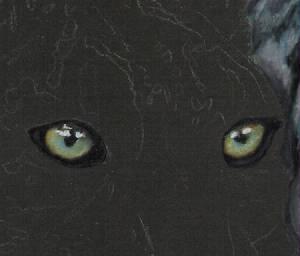
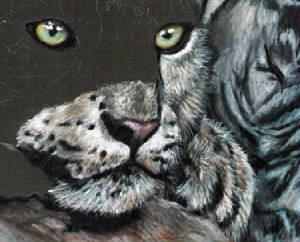
After the photo(s) are chosen they are drawn out onto paper as a basic sketch. All important details are included in this sketch. Then the fun part begins.
If the drawing is being done from one of the client’s own photos or one I’m doing commission-free, I simply work from the references available to me but I am pretty picky about what the photos look like, especially having worked from some pretty bad ones in the past.
Of course, if the pet has passed away and we only have a few basic photos available I will do my best to work from that.
Basic Sketch
Because I choose to work on toned paper I do the basic sketch in a light color, usually a light gray of some sort and since you can’t really erase colored pencil (I can’t anyway) I need to be sure that my sketch is just right.
Picture
Background - First Rock
​
​I normally don’t do a background of any kind as I like the animal to stand on their own. If there is any kind of background/foreground involved, I prefer to do that before I start the actual animal.
​
In this case I had to take care of a fairly intricate piece of rock that was to his right. The rocks in this drawing were created with ten or so shades of gray, along with browns, blues and some greens.
Picture
Foreground - Second Rock
I then moved on to the second rock to his left, using the same basic shades and colors. This rock was a lot smoother and much easier to draw. What I do is move small piece by small piece. I don’t do the entire rock in one shade and then add more. I do a couple on inches, put in all the detail and highlights and then move on to the next inch. It’s like having the drawing some to life one little bit at a time.
Picture
I Always Start With the Eyes
Once I move on to the actual animal, I always start with the eyes. The eyes of my animals can take up to three or so hours to complete, depending on the size of the eyes and how intricate the colors and shades are, but the end result is more than worth the time.

This set of eyes has probably eight or so different colors and many, many layers but I always put the white highlight in first and work around that. Also, for my blacks I don’t just use black because, to me, that’s too flat. For a “warm” black I use Tuscan Red with black over it and for a “cool” back I use Indigo Blue with black over it.​
Picture
Nose, Muzzle and Paw
After the eyes are complete I normally move down to the nose and then work on the areas of the muzzle and the mouth because those are the next most difficult. Once again, I move little by little, layering my colors.

Once I reach what looks to be a good “underpainting” I go over it with a colorless blender and then go back over it with more colors and layers of details such as the spots and the hairs. Once again, the “gray” fur in the drawing probably has at least ten different colors in it.​

As I continued working on the fur of his face and included the paw his face is resting on before moving upward. I also look back over what’s already been done and touch up hairs and colors.
Picture
Cheek and Forehead
I keep working on the face, working my way up to meet the eyes. At this point I have most of the face completed up to the ears. I prefer to save the ears for later because it’s easier for me to make them blend in that way.
Picture
Picture
The Ears
I finally reach the ears and make sure I put in all the proper shading and the fine inner ear hairs to make it look right. I think the ears are probably my least favorite part of the animal to start but once I’m half-way through they get to be fun.
Picture
The Body
Once the ears and other face fur is done I move on to the rest of the body starting at the neck and moving outward. This part always goes much faster than the face does.

I also keep going back over everything that’s been already done to make sure the shades and colors match throughout the whole animal.
Picture
ALL DONE
Here is the completed drawing. Only after I finish up all the basics and am fairly certain I am done, do I go back in and add the whiskers. They are the last thing to be drawn in before the piece is sprayed with a matte fixative to be protected from dust and dirt.

In this case I also went back in and darkened all of the rocks to make the animal stand out more.
Picture
Connect With Me
​​Copyright Aleks Davis © 2013 All Rights Reserved.
Proudly powered by Weebly
  • Home
  • Bio
  • Commissions
  • My Process
  • Contact
  • Galleries
    • Dog Gallery
    • Cat Gallery
    • Wildlife Gallery
    • Bird Gallery
    • Horse Gallery
    • Other Gallery
  • Client Testimonials
  • Shop